
In the realm of DIY projects, crafts, and hobbies, the art of silicone molding stands out as a versatile and enjoyable avenue for bringing your creative visions to life. Nice Rapid, a manufacturing company known for its innovative solutions, offers a guide to the fascinating world of silicone molding. From the essential supplies to the intricacies of the molding process, we’ll explore how this technique can turn everyday objects into personalized treasures. Join us on a journey where creativity knows no bounds!
Silicone Molding Essentials
Before diving into the art of silicone molding, ensure you have the following supplies at your disposal:
- Liquid Silicone Rubber: The core material for creating molds. Different types, like platinum-cure or tin-cure, offer distinct properties and curing times. Be sure to carefully read and follow the instructions specific to your chosen silicone type.
- Mixing Cups and Stir Sticks: Essential for accurately measuring and mixing the silicone components. While some silicone kits provide their own cups and sticks, disposable alternatives work just as well.
- Mold Release Agent: A vital spray or liquid applied to the object, preventing the silicone from sticking. Petroleum jelly, cooking oil, or soap can also serve as alternatives.
- Object to Mold: Choose an item of interest, whether it be toys, coins, buttons, shells, or even your own creations. Ensure the object is clean and dry before molding.
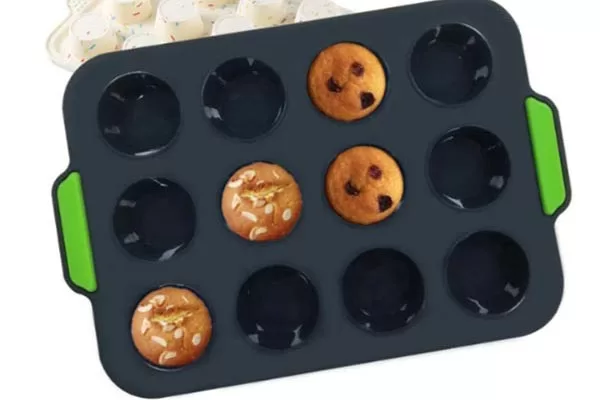
- Mold Box: A leak-proof container, such as plastic cups, cardboard boxes, or plastic containers, to hold both the object and silicone.
- Material to Fill the Mold: The final product material, such as resin, clay, wax, soap, or chocolate. Add colors, glitter, or other embellishments for a unique touch.
How to Make a Silicone Mold
Step 1: Prepare the Object
- Apply a thin layer of mold release agent to the object. This will help to prevent the silicone from sticking to the object and make it easier to remove the mold later.
- Fill any holes or gaps with clay or tape to prevent silicone seepage. This is especially important if you are creating a mold of a delicate object.
Step 2: Prepare the Mold Box
- Choose a container that accommodates the object with some extra space. This will allow the silicone to flow around the object and create a smooth, even surface.
- Create holes in the container’s bottom for air to escape during silicone pouring. This will help to prevent bubbles from forming in the mold.
- Tape straws or toothpicks to create vents. This will also help to release air bubbles.
- Secure the object in the center of the mold box with clay or tape if necessary. This will help to keep the object in place while the silicone is curing.
Step 3: Prepare the Silicone Rubber
- Follow the instructions on your silicone rubber kit to mix the components.
- Stir thoroughly to eliminate bubbles or streaks. This will help to create a smooth, even mold.
- Work quickly, as some silicone rubbers have a short working time.
Step 4: Pour the Silicone Rubber
- Gradually pour the silicone rubber over the object, starting from one corner and moving across.
- Ensure complete coverage, filling gaps or undercuts.
- Gently tap or shake the mold box to release any trapped air bubbles.
Step 5: Let it Cure
- Allow the mold box to sit undisturbed until the silicone rubber is fully cured.
- Curing times vary, so refer to the package instructions.
- Some silicone rubbers may take a few hours, while others may take a day or more.
Step 6: Remove the Object
- Once cured, carefully remove the silicone mold from the box, peeling off the object.
- Take care not to damage or tear the mold, and trim any excess silicone around the edges.
Step 7: Enjoy Your Mold!
Congratulations! You now possess a reusable silicone mold ready for various projects and crafts.
Silicone cube trays
How to Use Your Silicone Mold:
Now that you have your silicone mold, let’s explore some creative possibilities using different materials:
Resin
Resin is a versatile material that can be used to create a variety of projects, from jewelry to home decoration. When working with resin, it is important to use a mold that is compatible with the type of resin you are using. Some molds are specifically designed for resin, while others can be used with a variety of materials.
To use resin, you will need to mix it with a hardener according to the directions on the package. Once the resin is mixed, you can add colorants or glitter to create your desired effect. Pour the resin into the mold and allow it to cure. The curing time will vary depending on the type of resin you are using.
Once the resin has cured, you can remove it from the mold and finish your project. If you are creating jewelry, you may need to drill holes in the resin to add findings. You can also paint or seal the resin to protect it from wear and tear.
Clay
Clay is another popular material for crafting with silicone molds. Three main types of clay can be used with silicone molds: polymer clay, air-dry clay, and oven-bake clay.
Polymer clay is a non-toxic, synthetic clay that can be baked in the oven to harden. It is available in a variety of colors and textures, and it can be used to create a variety of projects.
Air-dry clay is a type of clay that does not require baking. It is made from natural materials, such as clay, sand, and water. Air-dry clay is easy to work with, and it dries quickly.
Oven-bake clay is a type of clay that must be baked in the oven to harden. It is made from natural materials, such as clay, sand, and water. Oven-bake clay is more durable than air-dry clay, and it can be used to create a variety of projects.
To use clay with a silicone mold, you will need to first condition the clay. This means kneading it until it is soft and pliable. Once the clay is conditioned, you can press it into the mold. Be sure to smooth out any seams or excess clay.
Remove the clay from the mold and let it dry or bake according to the directions on the package. Once the clay is dry or baked, you can paint or seal it to protect it from wear and tear.
Wax
Wax is a versatile material that can be used to create a variety of projects, from candles to crayons. When working with wax, it is important to use a mold that is compatible with the type of wax you are using. Some molds are specifically designed for wax, while others can be used with a variety of materials.
To use wax, you will need to melt it in a double boiler or microwave. Once the wax is melted, you can add colorants or fragrances to create your desired effect. Pour the wax into the mold and allow it to cool and harden.
Once the wax has hardened, you can remove it from the mold and finish your project. If you are creating candles, you will need to add a wick to the bottom of the candle. You can also paint or seal the wax to protect it from wear and tear.
Soap
Soap is a fun and easy material for crafting with silicone molds. Two main types of soap can be used with silicone molds: melt-and-pour soap base and cold-process soap.
Melt-and-pour soap base is a pre-made soap base that can be melted and poured into a mold. It is easy to use, and it does not require any special equipment.
Cold-process soap is made from scratch by combining oils, lye, and water. It is a more involved process, but it allows you to create custom soaps with unique scents and colors.
To use soap with a silicone mold, you will need to first melt the soap base or prepare the cold process soap. Once the soap is melted or prepared, you can pour it into the mold. Be sure to smooth out any seams or excess soap.
Remove the soap from the mold and let it set. Once the soap is set, you can cut it into bars or shapes. You can also decorate the soap with additional items, such as dried flowers or herbs.
Chocolate
Chocolate is a delicious and edible material that can be used to create a variety of projects, from chocolate bars to decorations. When working with chocolate, it is important to use a mold that is compatible with the type of chocolate you are using. Some molds are specifically designed for chocolate, while others can be used with a variety of materials.
To use chocolate, you will need to melt it in a double boiler or microwave. Once the chocolate is melted, you can add colorants or flavorings.
Silicone Molding for DIY Enthusiasts
As demonstrated, silicone molding opens a world of creative possibilities for DIY projects, crafts, hobbies, and personalized gifts. Nice Rapid, with its commitment to innovation, encourages you to explore the affordable, reusable, and versatile realm of silicone molding. With the guidance provided, there’s no better time to grab some silicone rubber and start molding your ideas into reality. Let your creativity flow, and watch as everyday objects transform into unique, personalized treasures!