
Silicone molding is a versatile and innovative process that can be used in a multitude of industries, from manufacturing to arts and crafts. It is a process of creating a mold from a desired object by pouring silicone into the object and allowing it to cure. Once the silicone has cured, the object can be removed, and the mold can be used to create multiple copies of the original object.
Silicone molding is a popular choice for many industries because it is a durable and accurate process. Silicone molds can be used to create a variety of objects, from small jewelry pieces to large industrial parts. The process is also relatively simple and can be done at home with a few basic supplies.
If you are interested in learning more about silicone molding, this guide provides valuable insights and tips for achieving successful results. The guide covers topics such as choosing the right silicone, preparing the object, pouring the silicone, and removing the object from the mold.
Choosing the Right Silicone Material
Selecting the appropriate silicone material is the foundation of successful silicone molding. Different projects demand various types of silicone, so it’s crucial to make an informed choice. Here are some things to consider when selecting a silicone material for your project:
- The type of mold you are making. Some silicones are better suited for making molds of intricate objects, while others are better for making molds of larger, simpler objects.
- The temperature range you will be using the mold in. Some silicones are more heat-resistant than others.
- The chemicals you will be using the mold with. Some silicones are more resistant to chemicals than others.
- The desired finish of the mold. Some silicones produce a smoother finish than others.
Once you have considered these factors, you can narrow down your choices and select the best silicone material for your project. Platinum-cured silicone is a good choice for many projects because it provides excellent mold detail, is resistant to heat and chemicals, and is suitable for both simple and intricate projects.
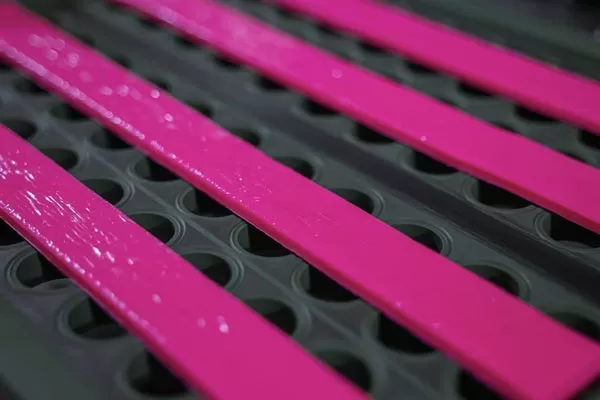
Silicone tapes
Meticulous Mold Preparation
Cleanliness is Key
Before starting your silicone molding project, it is important to clean your original object or model thoroughly. This will ensure that the mold is free of dust, debris, and other contaminants. Any imperfections or foreign particles on the model will be replicated in the mold, leading to subpar results.
To clean your model, you can use a mild soap and water solution. Be sure to rinse the model thoroughly to remove all traces of soap. You can also use a soft brush to remove any stubborn dirt or debris.
Once the model is clean, you can dry it with a clean cloth. Be sure to let the model air dry completely before proceeding with the molding process.
Taking the time to clean your model properly will ensure that you get the best possible results from your silicone molding project.
Proper Venting
Venting channels are essential for achieving high-quality molds. They allow trapped air to escape during the molding process, preventing air bubbles or imperfections in your final product. Vents should be placed in strategic locations throughout the mold, such as at the top and bottom and along any sharp corners or edges. The size and shape of the vents will vary depending on the size and complexity of the mold. It is important to experiment with different vent placements and sizes to find what works best for your specific application.
Accurate Mixing and Pouring
Precise Measurements
To ensure optimal results, it is imperative to measure your silicone components accurately. Follow the manufacturer’s recommendations for the mixing ratio, typically a 1:1 or 10:1 ratio of base to curing agent. Using a digital scale is highly recommended for precision.
Here are some of the reasons why it is important to measure silicone components accurately:
- To ensure that the silicone product has the desired properties, such as strength, flexibility, and durability.
- To prevent the silicone product from failing, such as cracking, breaking, or melting.
- To save money, inaccurate measurements can lead to a waste of materials.
- To reduce the risk of accidents, inaccurate measurements can lead to the creation of hazardous materials.
Here are some tips for measuring silicone components accurately:
- Use a digital scale that is accurate to at least 0.1 grams.
- Clean the weighing surface before each use.
- Use a clean container for mixing the silicone.
- Mix the silicone thoroughly until it is uniform in color.
- Pour the silicone into the mold immediately after mixing.
- Cure the silicone according to the manufacturer’s instructions.
Stirring Technique
When mixing components, it is important to do so thoroughly but gently. Over-stirring can introduce air bubbles into the mixture, which can affect the final product. A slow and steady hand is best, and it is helpful to scrape down the sides of the bowl occasionally to ensure that all of the ingredients are evenly combined. The goal is to achieve a consistent color and texture throughout the mixture.
Controlled Pouring
Gently pour the mixed silicone material over the model, starting from one corner and allowing it to flow evenly and slowly to cover the entire surface. This method minimizes the risk of trapping air bubbles and ensures an even coat. It is important to pour slowly and carefully to avoid creating air bubbles. If air bubbles do form, they can be popped with a needle or toothpick. Once the silicone has been poured, it is important to allow it to cure completely before removing the model. This can take several hours or overnight.
Patience in the Curing Process
After pouring the silicone, allow it to cure fully according to the manufacturer’s instructions. This is important because rushing this step can result in imperfect molds. A well-cured silicone mold will ensure durability and longevity, allowing you to create multiple replicas from a single mold. The curing time will vary depending on the type of silicone you are using, so be sure to follow the manufacturer’s instructions carefully. Once the silicone has cured, you can remove it from the mold and start creating your replicas!
Demolding with Care
When it’s time to de-mold your silicone creation, be careful and precise. Use gentle and consistent pressure to release the object from the mold. Rushing this step can cause tears or deformities in your silicone mold.
Here are some additional tips for de-molding silicone creations:
- Let the silicone cool completely before attempting to remove it from the mold.
- Use a release agent, such as vegetable oil or cooking spray, to help the object release from the mold.
- If the object is difficult to remove, try warming the mold with a hair dryer or warm water.
- Be patient and take your time. It’s better to take a few extra minutes to de-mold your creation carefully than to damage the mold or the object.
Conclusion
Silicone molding is a creative and practical technique that can be applied in various industries. By selecting the right silicone material, preparing your mold meticulously, mixing and pouring accurately, and exercising patience during the curing process, you’ll be well on your way to mastering the art of silicone molding. Remember, practice makes perfect, so don’t be discouraged by initial challenges. With time and experience, you can achieve outstanding results in your silicone molding projects.
Silicone molding opens up a world of possibilities, and these tips will serve as your guide to success in this exciting field. So, whether you’re creating art, prototypes, or functional parts, follow these expert tips to ensure your silicone molding projects are nothing short of extraordinary.