
The first use of anodizing technology was for protecting seaplanes from seawater corrosion. British inventors Stuart and Bengough filed a patent application for their anodizing process in 1923.
The pair implemented anodizing services on an industrial scale the same year and refined their method using the “sulfuric acid anodizing process” in 1927.
The two patented this anodizing method, which remains the most popular in modern applications.
Why Anodize Molds for Surface Finishing?
Anodizing metals offers many benefits. It increases corrosion and wear resistance and offers aesthetic improvements in mold finishes.
The anodizing process builds a thin oxide layer on metal surfaces, which is highly durable. This makes it ideal for injection mold finishing, providing a reliable, clean, and smooth surface on finished products.
The Different Types of Anodizing
There are different types of anodizing finishes for molds. Since color isn’t a factor with anodized injection mold tooling, it’s common for manufacturers to coat molds in clear anodized materials. The process uses a clear oxide layer allowing the underlying material to show.
Materials That Can Undergo Anodizing
Anodizing doesn’t suit all materials due to the differences in molecular composition. Materials suitable for anodizing include aluminum, tantalum, titanium, niobium, and zinc. It’s a common surface finish for aluminum molds since it’s easy to repair if the mold and anodized surface experiences damage.
What are the Disadvantages of Anodizing Mold Tooling?
- While anodizing mold tooling offers manufacturers plenty of advantages, this technology has some drawbacks.
- Not suitable for all materials.
- Scratches on anodized mold tooling may show in molded parts.
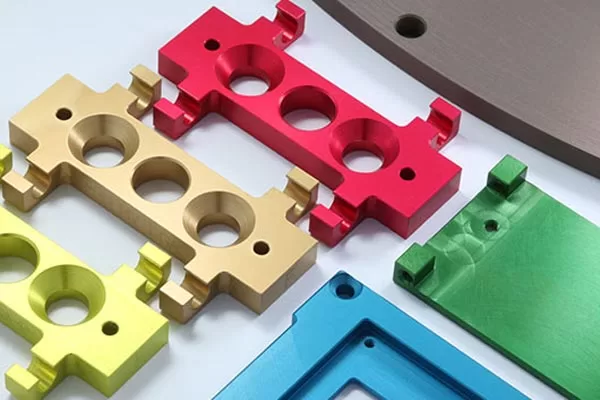
Anozizing products
The Anodizing Process – A Step-by-Step Guide
The anodizing process seems complicated but remarkably straightforward and easy to visualize. Let’s unpack each process phase step-by-step to better understand how manufacturers anodize mold tooling.
Step 1 – Surface Prep
The first step in the process is to prepare the material for anodizing. The surface must be clean and free from chemical residue, oil, or debris.
Start with blasting the surface using sand or glass beads. Glass beads provide a matte finish, and brushing creates a brushed appearance on the material.
When you have your required surface finish, you must treat and prep the surface chemically.
Step 2 – Anodizing
The technician connects the metal mold tooling to an electrical circuit, fitting it to the positive terminal. Also known as the “anode,” the technician secures and submerges the positive terminal to prevent it from moving during the process.
The “cathode,” or negative terminal, connects to an electrode the technician submerges in the anodizing bath.
The technician sends a charge through the electrical circuit. The cathode draws positively charged ions from the mold tool surface while the tool removes negative ions from the oxygen in the bath solution.
When metal ions leave the tool surface, it becomes porous, allowing the binding of oxygen ions to the tool surface. As a result, the tool mold experiences a buildup of an oxide layer.
Step 3 – Cleaning
After anodizing the tool surfaces, the technician cleans the anodized parts using specialized solvents, de-ionized water, and solvents. This process ensures the technician removes all excess bath solution and prepares the mold tool for a chrome finish.
Step 4 – Coloring
This is an optional stage of the anodizing process. Tooling manufacturers don’t use colored anodized solutions because they add to the cost and don’t add any benefit to the finished molded part.
However, for the sake of it, we’ll go over how manufacturers color materials. Manufacturers use processes like altering oxide layer thickness, color dipping, or electrolytic coloring.
Step 5 – Sealing Pores
The final step in the anodizing process is critical to its success and the final look of the finished mold part. Sealing the surface protects the aesthetics of the mold tool and improves its corrosion resistance.
The sealing process fills in the tiny surface holes left behind by the anodizing process. When the porous oxide layer is correctly sealed, it provides a long service life.
After forming the oxide layer, the technician cleans the anodized mold tool with a de-ionized solution before sealing the pores.
Manufacturers complete this step using “Hot DI” sealing, cold, room-temperature, or mid-temperature sealing processes.
Anodizing vs. Alodine for Surface Finishing
When coating parts using anodizing technology, it results in non-electrically conductive aluminum. However, the Alodine process preserves the conductivity of aluminum mold tooling.
- Anodizing is far more durable in terms of finish and withstands more wear and tear and daily abuse in production processes.
- Some of the key advantages of anodizing for mold tooling include the following.
- Extends tooling lifespan.
- Leaves a slick finish on molded parts.
- Excellent wear and tear resistance, good corrosion resistance.
- Excellent thermal insulating properties.
- Creates an attractive surface finish on the part and the mold tool.
What to Keep in Mind Before Anodizing Parts
- The anodized coating may change the tolerances on fine parts.
- A section of the surface may not be anodized correctly.